
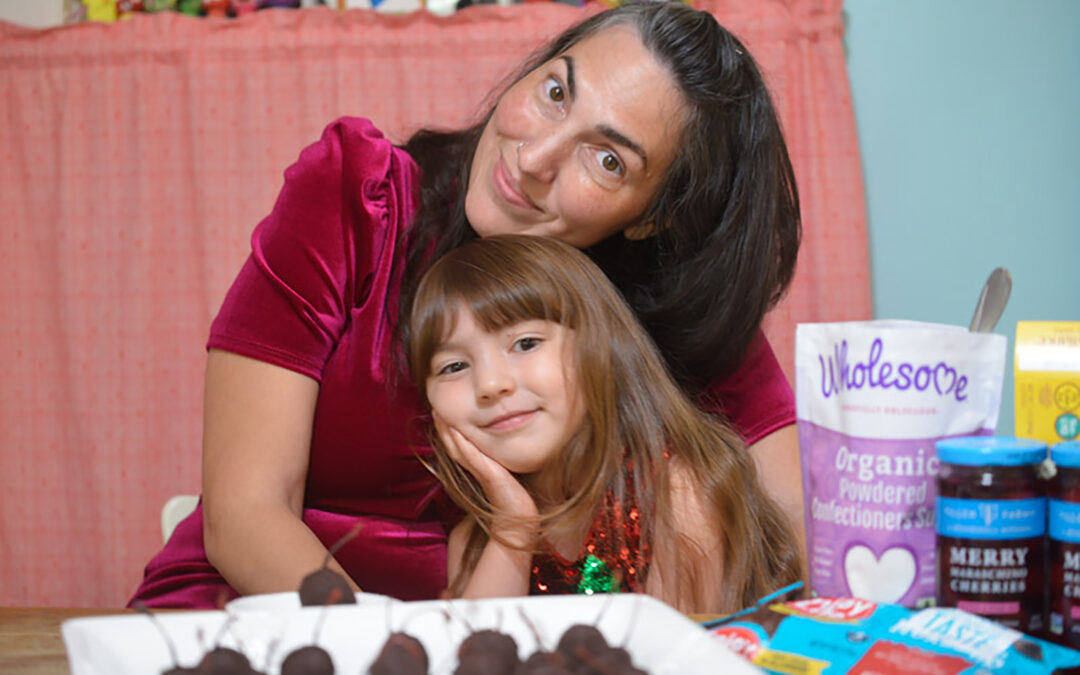
Kate Gorham is the owner of The Golden Button, an arts and crafts studio in Woodbury, CT. The Golden Button celebrated its 10th year in October of 2021 and throughout those ten years Kate has been teaching kids, teens and adults how to sew, paint and express themselves through arts & crafts. The Golden Button even goes on the road, leading special programs at schools, libraries and farms across the state. Kate ensures that The Golden Button is a safe place for everyone to create and be themselves – always celebrating diversity and individuality.
Kate is also the host of Beet Puffs & Glue, an Instagram account showcasing her homeschool adventures with her five-year-old daughter, June. At @BeetPuffsandGlue you’ll find ideas for everything from themed breakfasts, scavenger hunts, science experiments and so much more.
Aside from Kate being a beloved Woodbury business owner, she & June are much-loved New Morning Market family members. We are so excited to celebrate the holidays with Kate, June and all of you this year by sharing their delicious recipes. We sat down with Kate and asked her about her baking traditions and inspiration:
New Morning Market: How did you learn to bake?
Kate: I am mostly self taught I guess. Lots of trial and error. I learned how to bake traditionally in the sense that my mother cooks all the time. When I was little, about 5 years old, I remember baking with my Italian grandmother, making apple pies. My other grandmother (whom June was named after) baked the most beautiful perfect, Christmas cookies every year. She would have trays and trays laid out – perfectly frosted mint green and pink cookies with sprinkles in little bags. Now I know that she must have spent weeks making them all in her tiny kitchen. Before she passed away she wrote them all down in a notebook for me. I still take that notebook out with all its marks and stains (not inside a plastic cover) every year and work on making them as close to the originals as possible but now gluten free and dairy free. We each have a favorite of her cookies that I replicate every year. Learning to bake gluten and dairy free is quite tricky. I do have several favorite flours and I could absolutely not live without Enjoy Life Chocolate or peanut butter. After quite a lot of testing I found almond flour and egg whites to be quite magical.
New Morning Market: Why is gluten free and dairy free so important to you?
Kate: About 15 years ago I became very ill. I went to multiple doctors who couldn’t figure out what was wrong with me. I was getting sick all the time and it was making it hard for me to do anything. I lost most of my 20’s to being really sick. I finally went to Alison Birks, a local nutritionist, and within 5 minutes she knew I couldn’t eat gluten. A few years later I found out I couldn’t eat dairy either. Around that time I started to meet lots of young kids with the same food issues and allergies that I had. I was so sad for them that they couldn’t enjoy traditional treats that I was lucky enough to enjoy earlier in life and I sort of dedicated myself to making special things for them. To this day I still bring many of these kids boxes of treats for the holidays. The day before any special holiday we wrap all the treats up in special packages and make our rounds to all of our little friends. (Most of which are in high school now) I love baking for others and sharing what I make with them.
New Morning Market: How do you get inspired to start baking?
Kate: I am pretty much always inspired to make something, making sure I get that time is the tricky part. I will bake all day long if I can carve out a day to do so. Snow days are the very best days for baking. The truth is, I
would rather bake, paint or sew than pretty much do anything else.

Kate & June’s Vegan Chocolate Covered Cherries
Prep time: 5 min.
Bake time: 1 hour
Set time: Chocolate hardens in 10-20 minutes and can be eaten right away.
Makes: approximately 35-40 cherries
Ingredients
- 4 tbsp. vegan spread or butter substitute
(slightly softened) - 4 cups powdered sugar with cornstarch
(measure then sift) - (2) 13.5 ounce jars of maraschino cherries
(you may have some leftover cherries) - 4.5 tbsp. cherry juice (reserved from jars)
- 2 bags of dairy free chocolate chips

Directions
Step 1
Prepare a cookie sheet (that fits in your refrigerator) by covering it in a sheet of parchment paper. Put aside.
Step 2
Drain liquid out of maraschino cherries. (reserve cherry juice) Place cherries on a paper towel or clean cloth. Pat cherries dry. (Take caution as cherries can stain dishcloths and other surfaces)
Step 3
In a mixing bowl combine 4 tablespoons vegan spread or butter, 1 cup of powdered sugar and 1 tablespoon of cherry juice (if using a stand mixer keep on low).
Step 4
Continue to add 1 cup of powdered sugar and 1 tablespoon cherry juice at a time until all ingredients are combined. (Cherry/sugar mixture should be soft but not sticky. Think really thick frosting!)
Step 5
Scoop out 1 teaspoon ball of sugar mixture. Flatten dough then place one dry cherry into the center. Use your fingers to work the mixture around the cherry. Make sure to completely cover the cherries with mixture. Place sugar covered cherries into the refrigerator for at least 10 minutes while you melt your chocolate.
Step 6
Use a clean, dry double boiler to melt 1.5 bags of chocolate. Stir often. When completely melted, remove the double boiler from heat and set on a pot holder to work.
Step 7
Using the cherry stem, a toothpick, or a fork and a spoon dip the sugar covered cherries into the melted chocolate. Carefully spoon the chocolate to completely cover the entire cherry. Place about an inch apart on parchment covered cookie sheet. (Tip: gently spin stems to drip extra chocolate off or use a fork to wipe extra chocolate from each cherry, back into the double boiler.) Place in the fridge to set for about 20 minutes.
Step 8
Gently loosen the hard chocolate covered cherries from the
parchment paper. It is very important to seal the liquid inside the chocolate. Melt the remainder of chocolate to make sure the cherries are fully covered.
Step 9
Optional: to make these look extra special, you may want to use extra melted chocolate (or a contrasting variety of chocolate) to drizzle a bit of fresh chocolate on top. You can use a piping bag, the tip of a fork or a small spoon.
Step 10
Optional: If you would like to gift these, you can cut small squares
of aluminum foil to wrap the cherries or place them in an airtight container.
")
Kate & June’s Vegan
Peppermint Patties
Prep time: 15- 20 minutes plus 10 minutes in the fridge to set before adding chocolate covering
Melt time: 10-15 minutes
Set time: about 20 minutes
Makes: approximately 44 mini peppermint patties
Ingredients
- 2 tbsp. Earth Balance vegan butter (slightly
softened) - 2 1/2 cups powdered sugar (we used
Wholesome organic powdered sugar) - 2 tsp. peppermint extract (we used
Flavororganics) - 2 tbsp. coconut oil (we used raw extra
virgin Garden of Life) - 1 tbsp. plain unsweetened Silk cashew milk
(or any dairy free milk option) - 1 bag of Enjoy Life Chocolate (any variety –
we used dark chocolate) - plus 2 tsp. coconut oil
- optional food color and sprinkles
Directions
Step 1
Prepare a cookie sheet (that fits in your refrigerator) by covering it in a sheet of parchment paper. Put aside.
Step 2
In a mixing bowl combine 2 tbsp. Earth Balance vegan spread (slightly softened) and 2 tbsp. coconut oil (use stand mixer on low if available or hand mix with a fork or spatula, scraping often).
Step 3
Add 2 1/2 cups Wholesome organic powdered sugar, 2 tsp. Peppermint extract, 1 tbsp. Silk cashew milk (or any dairy free milk option). Mix on low till powder is incorporated then turn to medium until completely combined. Mixture should be very thick and dry. Mix until it starts to clump into a ball.
Step 4
Place one sheet of parchment paper on the counter, scrape peppermint mixture on top then cover with another sheet of parchment or wax paper. Using a rolling pin or a round jar/glass, press down and flatten to about 1/4 of an inch.
Step 5
Cut out shapes with mini cookie cutters or a knife. Carefully place cut outs on cookie sheet and place in the refrigerator until stiff (about 10 min).
Step 6
Use a clean dry double boiler to melt 1 bag of Enjoy Life chocolate. Add 2 tsp. of coconut oil to the melting chocolate. Stir often. When melted, remove the double boiler from heat and set on a pot holder.
Step 7
Using a fork, drop patties into the melted chocolate. Carefully flip the pattie over completely covering the patty in chocolate. Lift the chocolate
covered patty and gently shake the patty (still on the fork) back and forth, allowing the excess chocolate to fall back into the pot. Place about an inch apart on parchment covered cookie sheet. Place in the refrigerator to set
for about 20 min. These last for
at least a week in an airtight
container in the refrigerator.
You can eat them just out of the
refrigerator or leave them out
for a few minutes to soften up before you eat them.
Step 8
Optional: If you want to make these look extra special, you can use extra melted chocolate (or a contrasting variety of chocolate) to drizzle a bit of fresh chocolate on top with the tip of a fork or a small spoon.
More Recipes
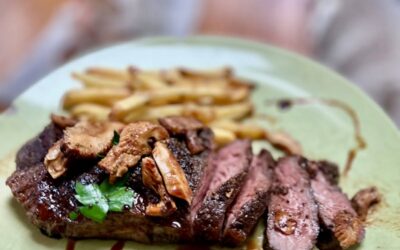
Sous Vide Steak
Clean Comfort Cooking with New Morning Market Grass fed cows free-roam the fields of their ranches and eat a diet of fresh grass. Grass fed and grass finished beef, like Thousand Hills Lifetime Grazed 100% Grass Fed Beef, are never fed grain of any kind, resulting in...

Butternut Red Lentil Slow Cooker Stew
Clean Comfort Cooking with New Morning Market A warm, cozy, and hearty stew featuring butternut squash, red lentils, and coconut milk. This easy stew takes just a few (pre-cut) ingredients and a few hours in the slow cooker. It makes the perfect easy weeknight dinner...

Clean Comfort Cooking Shortcuts
New Morning Market’s pre-cut organic veggies + our ready to cook marinated chicken are a delicious and easy-to-cook/easy-to-clean-up supper solution. Prep Time: 5 minutes or lessCook Time: 25 minutes (or so)*Clean Up Time: 5 minutes or less *Cooking times may vary...
Recent Comments